Apr 28, 2020

Lock-Down Cravings.

The total Covid-19 Lock-down in NZ, at level 4, was lifted during the night. Now we are at level 3 again, hopefully for just 2 weeks. Hopefully all will go well, as in no spikes of the virus.
Today lots of people around the country had their first taste of take-away food again...
That is not what I crave. 
I would love to go on an op-shop spree... however those will not open for some time to come.
Nor would I feel comfortable in there as yet.
I do hope everyone is having a good clean-out, hahaha!

Add caption
Luckily I had kept my last pre-lock-down week of thrifted treasures in paper bags, untouched,
as I had gotten squeamish about touching the second-hand things at the time. While I was alone today, with my man being back at work (in a covid-19 safe way), I unpacked the bags at last, and had the same thrill as when I bought them.
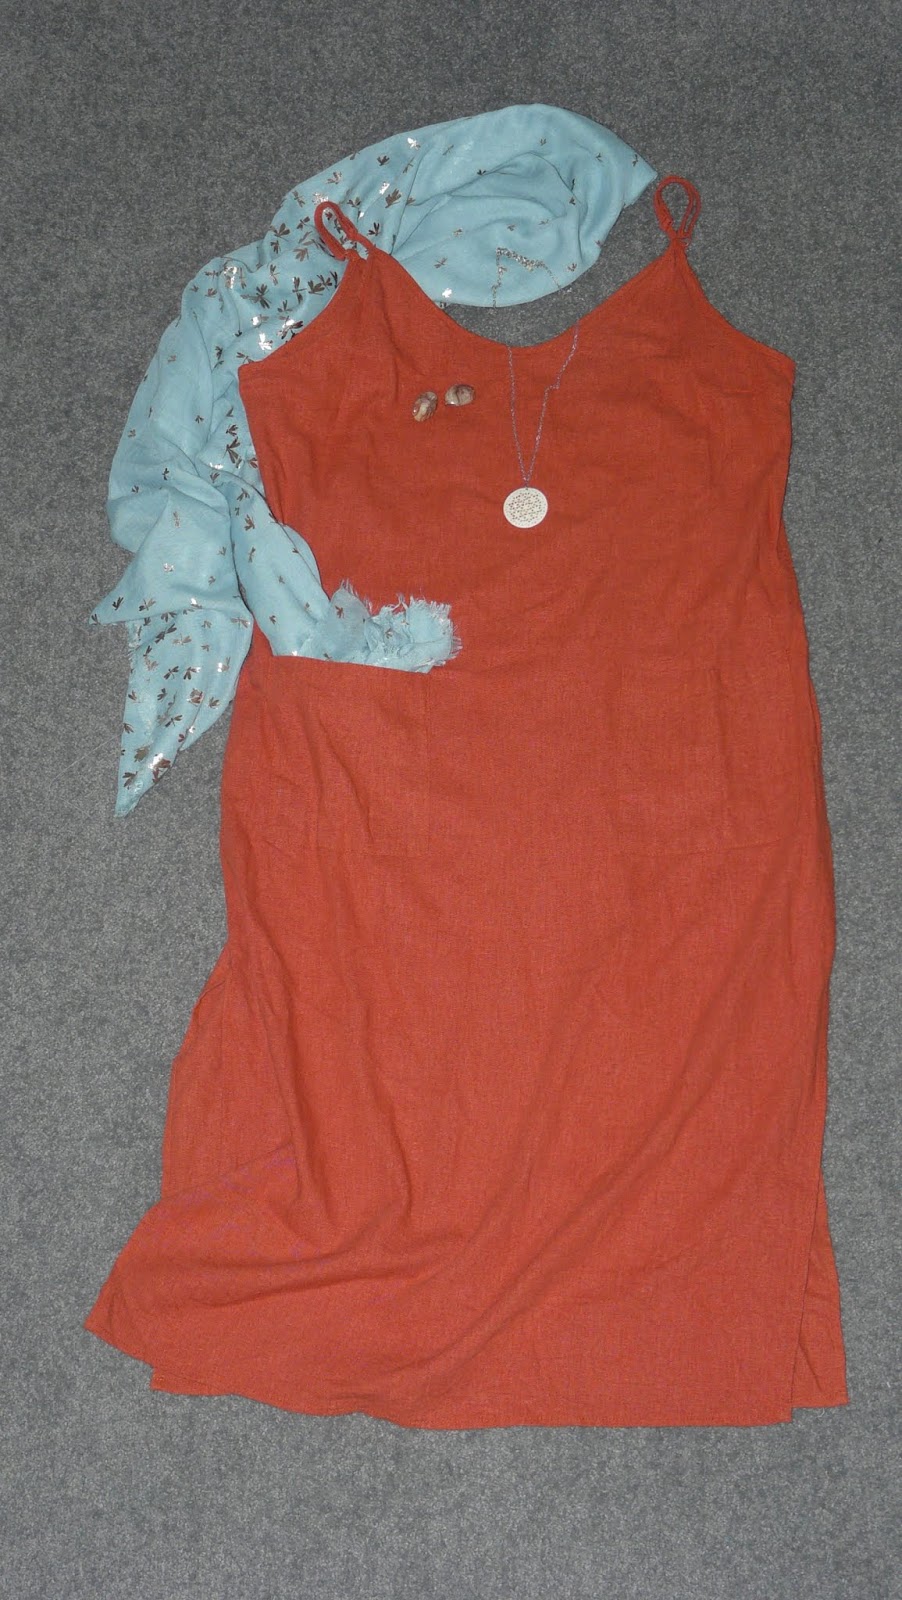
I had found quite a few vintage books, some I bought, some in the free box. Love this red book cover. Vintage keys, carved bone rose earrings, and a gentian flower. I really liked the fabric off-cut, prints of insects, botanicals and natural finds, just enough material for a new art-book cover or for the inside covers.
The plastic little horse is the third one I have found, I wonder if those came with a bottle of liquor or something similar.

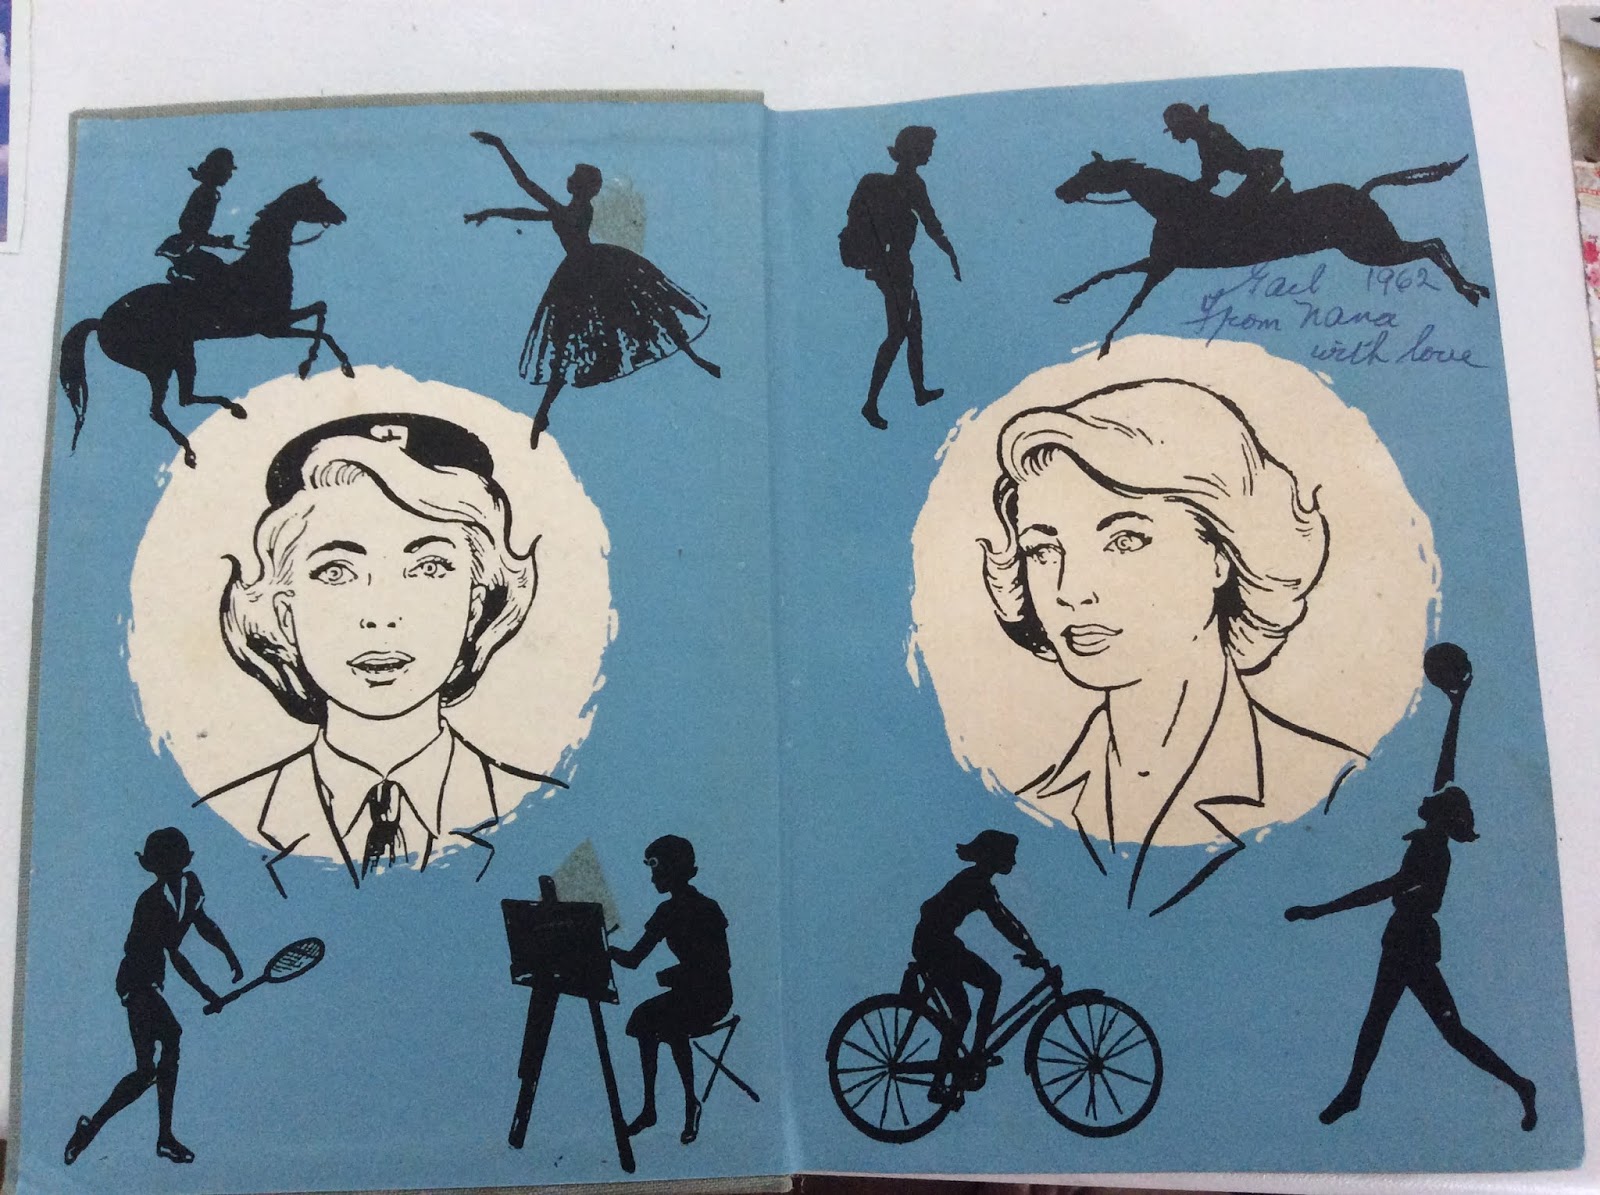
I also found books that I will pull apart for their contents, such as this new Victorian style photo album. I could achieve a lovely antique patina with sandpaper, inks and vintage papers. The illustration of the birds' nest is from a Nature Journal book, with gorgeous nature drawings on every page, a great find.
The bottom book has already been dismantled, with many sturdy pages of beautifully shot photos.


Other cheap Book Arts/ Collage Supplies came in the form of bird-of-prey illustrations, an empty garden diary, several empty notebooks, so easy to dismantle for the use of the pages in a handbound book. A stack of brown paper bags, and old library lending cards will add a neat vibe in a hand made book.
I treated myself to a new pack (yes from a retail shop, as serviettes don't come secondhand..)  of gorgeous botanical serviettes, frankly those are ridiculously expensive! But look so good melted into the background of a collage. These had wild flowers and honey bees printed on them.


My eye is always drawn to old embroidered linens, but I get picky about the quality of embroidery. I don't care about holes and rips in the old fabric, but the embroidery must be done nicely and finely.
I like filled satin-stitched flowers in bright colours. First they go in a bucket of fabric sanitiser to soak, then washed gently, and steam-ironed from the back. It is about the only ironing I do.
Pah!, who wants to do housework, when there are all these projects to make..
The silvery necklace isn't silver, and not a single link has all its diamanté's, but it just the right kind of worn vintage look I like. Same with the shabby faux pearl necklace. But the triple bracelet at the top is made of real egg-shaped irregular pearls, which can all be used in different ways.


More books were found in that week before the lock-down, most for free outside a secondhand bookshop. Gorgeous florals and botanical illustrations, an art book full of different paintings, and delicious vintage covers with raised patterns. The short-hand manual also has loads of pages great for back grounds, all those little scribbles. There are still people that know how to use that secretary code. Actually when I arrived in NZ you could still take typing and shorthand classes at school.


These books have already been relieved of their stories, Daisy was a particularly irksome tale and saccharine sweet. The wonderful holiday is a great title for a travel journal, don't you think?


A long sari veil, and tatted lace, just because. The long gold-tone brooch can be re-used and would look great in a necklace. But the hoop earrings are for myself, just as they are, in sterling silver. Tell you what, the serviettes from before could have paid for 3 sets of those earrings!
Hurrah, for fossicking! I feel I have satisfied a bit of op-shop cravings, for now...

Apr 3, 2020

A Watercolour De-Stress Kit.

  ...So we are on the 9th day of lockdown and social distancing in New Zealand, due to the dreaded virus. I am getting used to having my hubby home all day. We've been going for walks (in our 2 people 'bubble') everyday, and doing bits and pieces around the house. The drain in the bathroom is draining again, the garden is starting to look like we have a gardener in the house, and his pile of 'to read' books has dwindled by 6 already. 
Today I took my courage and a mask, and did the groceries. Which I found anxiety producing...
Yesterday I wiped away those recurring feelings by making a watercolour de-stress kit for our Daughter.
I had recently been tidying and found a set of watercolour paint-tubes, that had belonged to my dear late friend N. I had also been looking at travel art-sets on Pinterest, and I put the 2 ideas together.
BUT what to put the paint into, what with all other shops closed except supermarkets and pharmacies. I found a vintage Strepsil tin, which much be pretty vintage, as I can not remember Strepsel lozenges in a tin. I emptied it of pins and buttons, it was still pretty clean. 
Then found another idea on Pinterest! A solution; metal self-cover buttons! 
Well as it happens, I have a shoebox full of those, every time I see them in an opshop I buy them, for making brooches with vintage embroideries.

vintage tin and vintage self-cover buttons.

Most of them were white plastic, but there were a few cards in the right size made of metal. I undid the shanks with some pliers, 12 little button covers fitted into the tin, perfect!
using E6000 glue 
 I used E6000 glue to attach the little cups into the tin. I always have that in the house, handy glue.
extracting the watercolour paint from the old tubes
 Extracting the paint was a bit more bothersome, as some had gone quite gluggy, lids needed soaking in order to loosen them, and other tubes had dried up. I took the cutter to those, opened the tube, and cut off a little slice to fit into a cup, stuck down with a little glue stick. Once the paint gets used the paint will stick by it self. With watercolours it doesn't matter if the paint has dried, it still works the same. Room was left for 3 extra colours that were not there, yellow-green, dark-blue and white. In the meantime you could mix those, or use extra water to lighten the hue.
adding the rest of requirements to the kit
Then I scoured my work-room for the rest of the kit. First a box to put it all in, this 1 had a magnetic side closure, and pretty flowers on it.
A bunch of different brushes to play with, black and white ink pens for doodling, a water misting pen to wet the paper with.
Some thick serviettes for cleaning excess paint, a stack of watercolour paper cut to a non-daunting size.
 From my stash of preserving jars 2 tiny glass jars that actually fitted into the box, a Youtube address of 'watercolour for beginners' tutorials, and the colour's sample card, which I waterproofed with sellotape.
(And in case you are worried, everything had been wiped down, and I kept washing my hands during making this kit.)
the kit fits into an old envelopeand notepaper box.
After I had done the groceries, -were I picked up a roll of medical paper tape, to make nice white edges around the painting, and to stop the wet paper from buckling-, my De-Stress Watercolour Kit was complete. And popped it into Daughter's letterbox.
I hope she'll play with mark making and colours.

Jan 8, 2020

Sustainable Opshop Fashions.


The first week of 2020, and the local opportunity-shops have opened again. Most volunteers like to spend the Festive Season at home, but now they have restocked their shelves, and I like to visit those nearby on my list. I scored very well on nice clothes, and, as I usually go on about vintage books and jewellery, I thought I'd give you a little fashion show.
I have a lot of clothes, mostly recycled like this, and lately I look for natural long-lasting materials, like linen. Garments I can wear for years to come.


 I am loving the layered (or "lagen") look. Very easy to create too.
A mustard coloured tunic, 100% linen. (Two-fold opshop, Columba church, Taradale, $8 )
This was my most expensive item for the day, and I will probably take out the sleeves, as they pull a little.
Teamed here with a brown cotton skirt, covered with white embroidered leaves. (St.Vincent de Paul, Napier, $1)

 
A pink 100% Silk, fringed scarf, with some yellow and brown print. (St.Augustine church $0.50)
Bracelet with faux pearls and green handblown glass beads (Salvation Army store, Greenmeadows $1) and from the same shop a vintage pin with pink ceramic forget-me-nots, ($3)


A pleasing rusty-red dress, just past the knees-length, with side splits, adjustable straps, and -oh joy- POCKETS. Made from a viscose linen blend. (Red Cross shop, Onekawa, $5)
A long cotton scarf in my favourite sky blue, printed with silver dragonflies. (Twofold opshop, Taradale, $3) Saw it, grabbed it immediately. Gorgeous.


Accessories to go with this outfit, are vintage clip-on earrings with real slices of natural geodes, (Greenmeadows Sallies, $2) and a silver tone necklace with a carved bone pendant (Taradale Sallies, $5).

A pair of wide 3 quarter pants, in red linen and viscose blend, (Twofold opshop, Taradale $5)
With a white v-neck t-shirt (Savemart, Ahuriri,$3.99) and the blue scarf.


The earrings as before, but now with a vintage brooch, goldtone with teal Austrian crystals, (Sallies, Greenmeadows, $3)
 Here is the mustard tunic again, this time teamed with oatmeal coloured linen drawstring pants (Twofold opshop,  Taradale $4.50) Brown raw silk scarf (St.Augustine church, $1)
My faces' skin colour does not like to be teamed by too much yellow, so if I wear a different colour scarf, this seems to stop people asking me if I'm alright...hahaha.


The same combination but now accessorised with light-blue.
Lightweight blue and white sandals with a slight heel, (Red Cross, Napier, $7)


And the mustard tunic again, but now with the red pants and pink scarf, and a pair of red Rieker shoes. (Red Cross, Napier $7)
So, there you go. Comfortable and inexpensive clothes, easy on the wallet, eye and landfill.
I hope you liked shopping with me!

Jul 3, 2019

Experimental Eco-dyeing on Paper.


At the moment I am enamoured with paper, and am slowly tidying several piles of vintage books, papers and card. Another re-purposed book is in the making with a woodland theme, and I am making a lot of my own resources instead of buying new purpose printed, and generic (which makes it very boring for me) craft paper from the shop. I had a lovely bouquet from my daughter, which was definitely past its' beauty, and the technique of eco-dyeing was studied on-line.

Resulting eco-dyed pages, after drying and pressing.
Natural dyeing is something I have done before, with wool yarn, to get an overall colour, so I know a little about mordanting and different plants. I was expecting subtle colours, and hoped for stronger imprints. I was also doubtful about the papers holding together.

Ingredients; plant materials, papers, alum as mordant,
 and a large pan, which will only be used for this.
I bought an electric frying pan with lid secondhand for $15, as it can contain the papers lying flat, and it has a thermostat which can be set to 80'C, as keeping it all simmering, is more dye productive than boiling. Boiling can destroy the dye molecules.

Dried larkspur, blue hyacinth, daisies, gerbera, bay leaves,
ferns, adding red onion leaves, lichens, etc.

Fresh winter pick of ferns, climbing ivy leaves and berries,
eucalyptus, oak, and  old autumn leaves.
I went around our property and gathered some more plant material. Hopefully those ivy berries would give some colour. Now to prepare the mordant and papers.

2 tablespoons of alum in a throw away container,
although alum is fairly harmless.

Dissolve the alum in warm water.
I decided to use filtered water, as we have chlorine in our water these days. Chlorine has a bleaching effect of course, and I did not need a chemical reaction like that at all...

Wetting the papers in the alum water.
To prepare the stack of paper, both thick, transparent, new and vintage, I simply submerged them in the alum water and stacked them on the plastic covered table.

All the leaves sandwiched in the wet papers.
I took off a lot of hard woody stems, and arranged the leaves, flowers and berries in the wet papers.
Some paper had already given up the ghost, mainly lined school writing paper. It just fell apart.

I tied up the stack with a large wide ribbon.
At first I wanted to tie up the big sandwich with wire, but was afraid it would just rip the paper. A friend had just given me meters of wide satin ribbon. That held it together gentler, and still tight enough for the plant material not to shift place.

eucalyptus leaf and gumnut, avocado skin, and copper tube offcuts.
Added to the dye bath to provide overall colour, I added gum leaves and nut (goldens), avocado skin (soft pinks) and copper tube offcuts, which can bring out greens and blues from the dye plants.
You can instead add rusty iron, but that can bring out more yellow and browns, and darken colours.
For that reason I don't use an aluminium pan, as that will only produce 1 result. this pan has a teflon coating, elliminating any reactions. Stainless steel is also neutral. An enamelled pan should not have cracks or chips in the enamel, this exposes the iron underneath. Unless you want that.

Submerging the paper sandwich with a heat proof weight.
Time to cook. The papers were weighted down under the pans' lid, and I brought the allumed and added filtered water nearly to the boil, then set the thermostat to 85/90 'Celcius.
And left it to simmer, with the kitchen windows open, for an hour.
(Please be aware that some plants can produce poisonous fumes, such as oleander. Don't use it. Please check.) 
Simmer gently for an hour.

Take out the hot package with care.

Drain and cool.
I let the bundle drain and cool down. I contemplated letting the papers dry overnight, flat with the plant material on it. But plants were already falling off, and I was going away for a few days. Things would have gone moldy instead.
So I unpacked everything, and was pleasantly surprised.
All the papers drying in the kitchen.

Crinkles and folds.
Beautiful green leaf imprints.
Some of the colours are subtle, and there are lovely organic plant imprints. A number of cheap printing papers were ripped, or got holes in it. The thick vintage kids book pages worked very well, so did photo album pages with the in between tissue papers. Old music sheets and thicker printing papers did well too. After they all dried, I pressed the pages with an iron for a smoother finish.
Another successful experiment, for the girl that failed chemistry!
Blues from the climbing ivy berries and pink from bougainvillaea.


Apr 2, 2019

How to Alter an Old Book into a New Journal.

Altered Book Journal.
If you feel the need to journal your days, or are trying to keep track of things, why not make it really personal and create your own Notebook.
(If you have a problem with "hurting" books, please remember there isn't actually a "Book Police"..)
So here is my picture-rich tutorial on how to make your own Journal out of an old book.

STEP 1;   Get an old book from a second-hand book shop, flea market, or check with local library throw outs or relatives' bookshelves.
 Don't get a book that has hundreds of pages, it is just daunting to work in.
Make sure it is a hard-cover book, and that the pages have been sewn in, NOT glued in. After you are finished with it, and have added glues and paints and collage, you don't want your pages to fall out of the book because the glue holding the book together has weakened.
You can check if the pages are sewn in, by checking at the top of the spine, to see if the papers have been bend double. There should be a visible loop of papers. When you open the book in the middle of one of those loops (which is a stack of papers called a "signature"), you should find a thread down the middle of the pages.
Finding and reducing volume of signatures.
STEP 2;    In my case I found a (rather tedious) girls' book about an english boarding school. It had a faded blue linen cover. Each signature had 5 pieces of doubled paper. I reduced that throughout the book by carefully ripping out 1 full page, taking care not to break the thread. Because you will be adding extra paper, glue and paint, the book still needs to be able to close.
Each signature now had a number of pages divisable by 2, because now you are going to glue 2 pages together. This way the paper will be thicker and can handle all the stuff you are going to do to it. You can use either a good glue-stick for this, or tacky craft glue. Don't use normal p.v.a. or white craft glue, as it is too wet, and it will seriously buckle your pages. And will take ages to dry.
 I used a glue-stick for this book. Let dry by standing the book up with the pages open.
The end papers were really cute, and I left the inscription from 1962.

Old magazine, coffee and rip rip rip!
STEP 3;   Decorating your Journal-to-be. This is a really relaxing bit, where you get an old magazine, a hot cuppa, and cut or rip out pictures and quotes that you like. I used just 1 Country Living UK magazine for this whole journal, it was so chock-full of goodness. But you might like a fashion mag, or nature, or travelling; whatever takes your fancy.
Make sure the pictures are not too big, as you want to leave some space for actual journaling...

Some pictures are cut, some ripped for soft lines.
STEP 4;    Glue your pictures into the book, using a gluestick. Smooth any air bubbles out with your fingers, or an old plastic bankcard. Keep them to the edges of the book pages.

Stand the book upright with the pages fanned out to dry.
I found that I was colour coordinating images, or theming things together on the same page.

Using water activated colouring pencils, Derwent Inktense.
STEP 5;    Adding colour to your pages. I used my Derwent Inktense colouring pencils, but you can use other aqua pencils. I just scribbled different colours all over the pages, choosing to coordinate with the colours in my pictures.
 ( It's o.k. Really. No one is going to come and arrest you, for defacing this old book. You are just rescuing it from landfill, to live a new life...)
White Gesso.
STEP 6;    Now you can brush white Gesso over the top of all your colour scribbling, and partly over the pictures. Gesso is usually used to prepare a surface for painting, as it is a bit chalky to the touch and lets paint and glue adhere well. We are using it in the journal to obscure the printed words, and at the same time activate the coloured pencil pigments. The colours will blend into the Gesso, giving a soft colour, but you will still be able to faintly see the print and edges of the pictures underneath. This gives a lovely layered depth effect to your pages.
Obscuring text with tinted gesso.

Using the tinted gesso to soften and blend pictures into the page.

Drying in the sun.
Gesso a couple of pages at the same time, then dry well, leaving the pages spread open.

Drawing in cubbyholes for the days, using a cardboard rectangle.

STEP 7; Rooming in your Journal. Depending on how you want to journal, you can now create spaces on the pages for note keeping. My new Journal had 29 full spreads, giving me 2 spreads for each month, with some spare pages. I worked out how many rectangles I could fit across a page, without having to write too small, and then made a little rectangle from the magazine cover that I had ripped up. I used it as a template to draw around with a black pencil. These measurements all depend on how large or small your old book is.
I used a black pencil, because Gesso can be a pain to write on with a Sharpie felt pen.
For that reason I also suggest a gel pen, or ballpoint pen for writing.


I left some space at the end of each month to record things like exercise session totals, etc.
And a page for books I have read, at the end of my new Journal.

Adding vintage fabrics and notions for the cover.
STEP 8;    Decorating the cover of the book. I used some old embroideries, a piece out of a stained, but cheerful tablecloth, vintage cards of hooks and eyes, and a crocheted flower. I used pinking shears to cut out the fabric, to minimise un-ravelling, and carefully cut around the embroidery, without cutting the embroidery threads. Using a generous amount of tacky craft glue on the back of the fabrics I stuck them down. Make sure the fabric goes into the grooves of the book, to give space in the fabric when opening and closing the book. The fabric also covered up the original title of the book.

A bookmark with tag.
STEP 9;    I wanted a bookmark, and found a suitable length of ribbon. (Actually, this ribbon was inside the shoulder seams of one of my shirts, for hanging purposes, but always flipped out of my shirt while wearing it. So I cut it off...) Adding tacky craft glue to one end and using a thin knitting needle I pushed it into and against the spine of the book, and held it there until it started to stick.
A fancy card tag from a new garment was re-used to make my collaged bookmark. I also added some beads to the ribbon.
My Journal in use.
STEP 10;    Start using your Journal!  I use mine to track sleep patterns, exercise, mental health, and to prompt myself into creativity. It is your Journal, so do what you like in it.

 I just had to create one of my collage critters in it, with the left over magazine pictures. Fun!

A Sweet Collage Critter of mine.