 |
| Cats, owls and fairies, and a x-mas tree. |
It is the last week of school before the big x-mas holidays, and the children at school were making decorations, including paper snowflakes. I had a go too, and got completely hooked! I haven't made these since I was at school myself. I did some at home and they were turning out really nice, so here is a tutorial for you, dear readers!
Can you spot the mouse in the one with the owls?
 |
| step 1 |
You need a sharp pair of paper cutting scissors,
a soft pencil (so you can rub out any mistakes easily)
and a rubber ,
ordinary copy paper ( so it's easy to cut tiny snippets through 6 layers of paper)
and I used a saucer to get a quick circle.
Step 1: Draw a circle on the paper with the help of a saucer and cut out.
 |
| step 2 |
Step 2: Fold the circle in half, making sure that the edges are exactly on top of each other. Make a sharp fold by using your fingernail or the handle of the scissors.
 |
| step 3 |
Step 3: Fold in half again. Make sure the folded edges are exactly on the other folded edge. Make a sharp fold.
 |
| step 4 |
Step 4: Fold in half again for the 3d time. Edges on the edges and rub on that edge with some pressure.
 |
| step 5 |
Step 5: Now you draw on your design. The trick with that is ; everything has to interconnect, otherwise it will be cut off. I will cut past the tail of the sitting bird all around the snowman's fingers and his body, back up the snowdomes' circle. If I had attached the bird's tail to the circle then I would not be able to get to the next area with my scissors.
Everything that is on the edges of the paper will mirror image.
Don't worry, you will make a few mistakes, but the paper is really cheap!
 |
| step 6 |
Step 6: start cutting the small fiddly bits first, that way you still have plenty of paper surface to hold on to with your fingers. If I had cut out the thin half circle first, it would probably have broken later when I had cut out the bird and star.
 |
| step 6, little details first |
Try not to cut with the point of the scissors, but rather with the part closest to your hand, it will give you more control.
 |
| step 7 |
Step 7: Don't worry if the paper bends or curls up. The whole snowflake can be ironed on a low setting later to flatten it again.
 |
| step 8 |
Step 8: Find the middle fold and unfold very gently. Don't just pull it open but use your fingers to open out little areas at a time.
Here you can see that the bird and star are now 2 birds and a star connecting the snowdome circle.
 |
| step 9, oops I forgot some details! |
Step 9: Unfold the second fold carefully. Oh no, where is my snowmans' happy smile!
I'll have to fold it up again and cut out his buttons and nose and mouth!
 |
| step 9 |
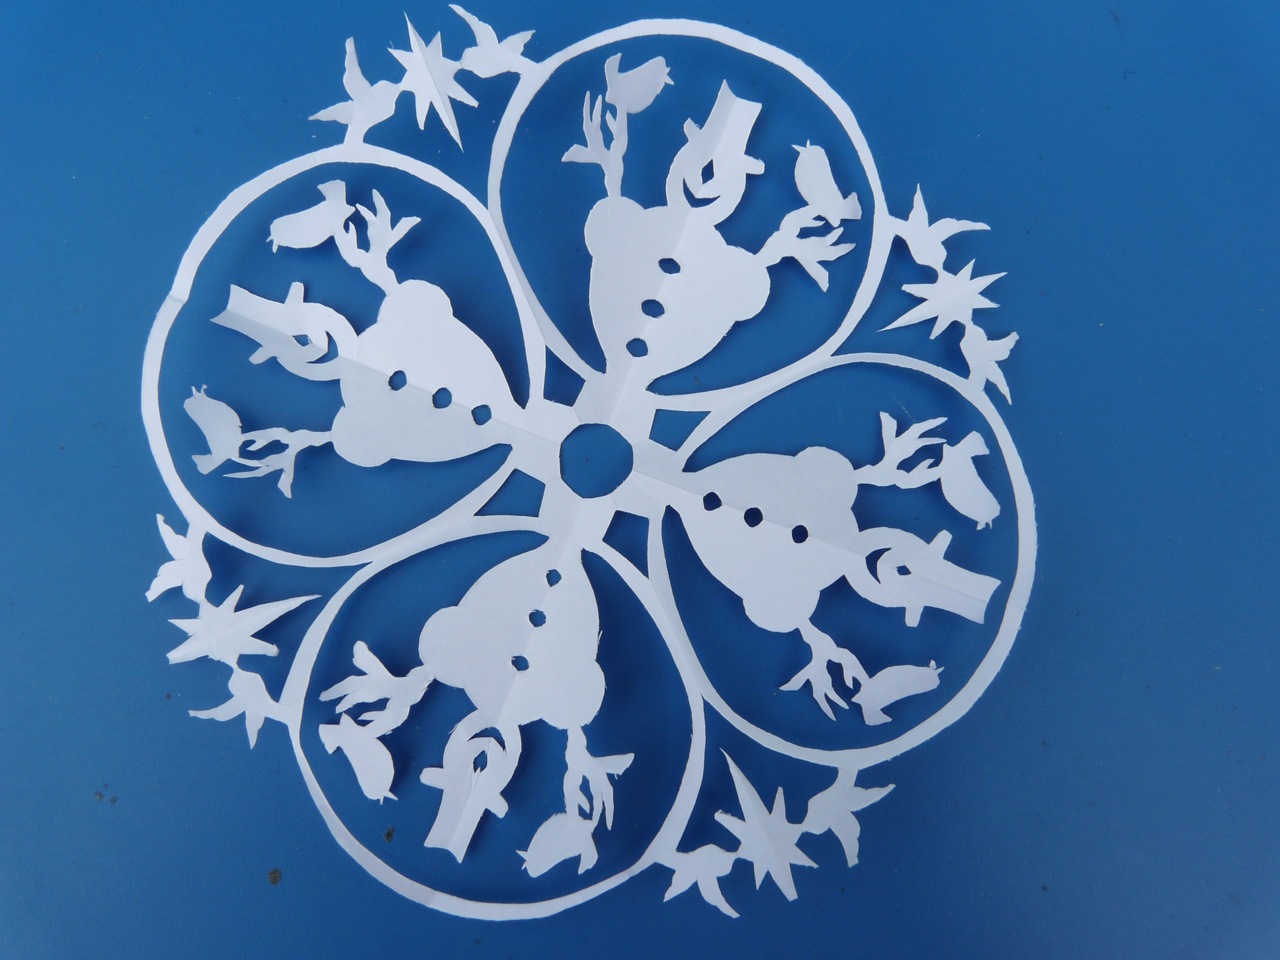
There he is! He is so happy with his 2 singing robins.
 |
| step 10 |
Step 10: And unfold the last fold. Carefully does it! No pulling!
Now you can iron it flat (make sure your iron is clean).
Use it to decorate your tree or your window, or get it laminated to protect it from damp glass, or photocopy it with black paper behind it and make cards, book marks, make them smaller for labels.
And who says all the pictures have to be x-massy, make fairytales or easter themes, dancing children or flowers, teapots and cakes, babies and prams. Draw whatever you fancy.
The snowflake itself will make even elephants and giraffes look festive.
 |
| more paper snowflakes. |
Top: a x-mas tree with 2 little birds in a snowdome with a hearts and stars guirlande.
left: deer and little trees
right: squirrels, acorns and oak leaves.
 |
| and even more paper snowflakes! |
Top: Dancing girls holding hands and reaching for the star
Left: I love strawberries and cherries with Christmas
right: roosters and hens and lots of eggs.


2 comments:
Wat leuk Ellen! Ik heb vorig jaar in de winter ook een heleboel gemaakt, hingen bij ons voor het raam! Ik had weer helemaal het gevoel van vroeger op de basisschool.... Ik zal deze week even een pakketje posten voor je, hopelijk bereikt het je nog voor de kerst.... Liefs!
Ik heb 3 dagen lang zitten knippen, 1 met ontbijt en 1 met de koffie enz. Wist niet dat ik het zo netjes kon!
Ik zit iedere dag nog op de lagere school, het houd me jong at heart!
I can't wait for my package! Exciting!
Hope baby and You are fine!
Post a Comment